Wednesday, April 30, 2014

EYMM Mommy and Me Blog Tour

I was very excited to be selected to participate in this tour.  I *think* I may have a little bit of dorky mom in me, because as soon as I read the title I was imagining matchy-matchy outfits for Inara and I.    But I managed to talk myself out of that pretty quickly, mostly because I could feel Inara's eyes rolling just at me telling her my idea.  <Disclaimer: I will be reimbursed for the purchased pattern as part of this blog tour, but all opinions are my own!>

So we sat down and flipped through the Everything Your Mama Made & More patterns that I already owned (which is nearly all of them, lol).  And on our flipping we saw Riley's Nightgown and Sleepshirt.  In her intro email, Kymy brought this pattern up as a way to involve your little man, and I thought, how cute would it be if we all had them??
The details:
Riley's sizes NB - 18yrs  and Callie's sizes XS - 5X
Gown or sleep shirt length
long or short sleeve options
Available for purchase individually or as a bundle

Sewing time:  approximately 45minutes.  The longest part is finishing the bottom facings. 

So first came Connor...  He got this cool knit print that I picked up in a destash group months ago, paired with a kelly green cotton-lycra blend for the sleeves and binding.
Riley's Nightgown and Shirt from EYMM by Keep Calm and Carrion
I said "pose like your sister," and this is what I got...
He loves it, but then again, most of his jammies consist of t-shirts that are too big that come down to his knees anyways.  And I have to say that nightshirts are perfect for late night diaper changes - no pants to mess with getting off and on!  The length is perfect on him.  He's nearly 22 months, but small for his age, and is a RTW 18mo.  I did the 18-24mo on him, and its perfect. 

Then came Inara.  She picked this bath diva print and paired it with what was left of the pink/yellow/white bubble print that we picked up in the red tag section at Joann's a while ago (*Note to self: look for more of this before Daffodil Dash ends*)  I did the size 6 on her, so she would have a little growing room, but did the nightshirt length as well.
Riley's Nightgown and Shirt from EYMM by Keep Calm and Carrion
Best. Pose. Ever.
So now they're both happy with their night shirts.  Like really happy.
Riley's Nightgown and Shirt from EYMM by Keep Calm and Carrion
Jump on the bed happy. 
We don't usually do photo shoots all over the house, so they were having a ball.  And on to me... (I still hate being in front of the camera.)  I picked up the Callie's Nightgown and Nightshirt to sew for myself.  I did a size bigger than my measurements called for, and here's why.  Little man still breastfeeds.  Mostly at night, and a nightgown that I can easily feed him in, without falling out of all night (I know, I know, TMI, but really, who designs nursing nightgowns??)  In retrospect, I could probably have just sized up the neckhole, but since I chose an interlock print for mine (pink guitars from the group Fabric Dealers on Facebook), I wanted to make sure I had all the stretch I needed.  The sleeves are from a solid pink interlock and the neck binding is a ribbing that I have no idea where it came from... (sign of a recovering Fabricholic).

Riley's and Callie's Nightgown and Shirt from EYMM by Keep Calm and Carrion


I did the nightshirt length on mine as well.  Apparently we are a nightshirt kind of family around here.  The pattern is really easy to follow, with clear and simple instructions.  Which is true of all of Kymy's patterns.  The fit is great as well, just go with the measurement she says is most important and you can't go wrong.

Riley's and Callie's Nightgown and Shirt from EYMM by Keep Calm and Carrion
That mirror smudge is making me really embarrassed. 
So dorky or not, we all took our photos, brushed our teeth, read a story, and went to bed in our matching nightshirts.  AND if you want to be cool (dorky)  and extremely comfortable, like us, you can pick up the Riley and Callie's Sleepwear bundle and save 15% off what it would be to get them individually.

Riley's Nightgown and Shirt from EYMM by Keep Calm and Carrion
The majority of our photos look like this...
 I also highly recommend joining the Everything Your Mama Made and More Facebook Group in case you have any questions or want to keep up with what's going on with EYMM.

Thanks for stopping by!  And please check out the rest of the tour!


EYMM Pattern Tour www.eymm.com

4/28 - Lisa www.piepiedesigns.com

4/30 - Deborah www.sproutingjj.blogspot.ca

5/1 - Alyssa www.calmandcarrion.blogspot.com

5/2 - Tasha www.FriendsStitchedTogether.wordpress.com

5/3 - Emily Www.justanothersewingmama.com

5/4 - Nienke www.pienkel.blogspot.com

5/5 - Shino www.nutta.typepad.com

5/6 - Melissa www.rebelandmalice.blogspot.com

5/7 - Erin www.craftybiggers.com

5/8 - Jessica www.bunchoberries.blogspot.com


Riley's and Callie's Nightgown and Shirt from EYMM by Keep Calm and Carrion

Monday, April 28, 2014

Tie Dye Diva Perfect Party Dress Blog Tour


I was really excited when Kathy of Handmade Dress Haven posted that she was looking for people to join this blog tour, and I picked up the pattern and got the wheels turning and sat there crossing my fingers hoping I would get picked.  <Disclaimer: While I purchased the pattern for this tour, there are affiliate links in this post to the Tie Dye Diva pattern shop>.  The Open Back Baby Dress has been my go-to pattern for summer baby gifts since last year, and I love it.  Jen's (the designer behind TDD) patterns are well written  with clear instructions that will help you create beautiful, professional looking garments. 

Tie Dye Diva Perfect Party Dress by Keep Calm and Carrion
Check out her shoes. 
 If you haven't seen the Perfect Party Dress from Tie Dye Diva, you really should check it out.  It's a great "blank slate" type dress that you can make fit any child's style. The pattern is available in two sizes 0-24mo and 2T-10yrs.  AND since you've come to check out our tour, you can get the pattern on sale for $6.00 instead of $7.95.  (Discount is applied when you add the pattern to your cart). 
Tie Dye Diva Perfect Party Dress from Keep Calm and Carrion


Inara as usual picked her own fabrics.  I sort of had an idea that I wanted a main and an underskirt, or a paneled skirt of some sort.  And I originally planned on doing a sash, so I told her to pick three fabrics.  I think she did pretty good.  They coordinate perfectly.  The white and black have these tiny tonal flowers on them that pick up the flowers in the main print very nicely.  I'm really starting to enjoy watching her process as she chooses fabrics.  She's way more natural at it than I am.

This was our muslin.  Clearly we needed some work. 

Keep Calm and Carrion PPD tutorial

I decided on a wider, gathered strap, and this was the point where I also decided I didn't want a built in sash, so when I cut out my final pieces, I used the front lining piece for main and lining. I also brought the front and back bodice down a little so that the strap would show better on the one side.  We used the size 6 and cut the neckline down to the lowest mark on the pattern.   Please don't mind my miserable scrap mess... I have a plan for it!

Keep Calm and Carrion PPD tutorial

 Once I cut out the pieces I cut down the side where I wanted the accent strap and repeated it on the back main and lining for that side as well.  I cut my accent strap 5" wide, sewed it in half to form a tube, and then lined it up with the bodice pieces to determine the proper length.  I then gathered the ends and attached it to the front and back as shown:

Keep Calm and Carrion PPD tutorial

 This was a little awkward when sandwiching to attach the lining, but it worked out:

When attaching the main to the lining, you do it like you normally would, but your back piece sort of hangs loose until you attach the underarm seam.  Be careful here to make sure that your strap isn't twisted before you attach the underarm.   I decided on an exposed zipper instead of buttons, because I had this lovely lace edged zipper that I wanted to use.  Before  attaching the zipper, I folded up the bottom edge of my lining 1/2" all the way around, so I could enclose the waist seam at the end. 

Tie Dye Diva Perfect Party Dress from Keep Calm and Carrion


**Here is what I did NOT consider.**  In doing the exposed zipper, I sewed the back seams like I would for buttons, so there were no raw edges.  Then I laid the zipper on top and basted to make sure it was straight and then stitched it on.  The end result is that the dress is a little big on Inara.  I choose the size 6 allowing for about 2" of ease in the bodice, so I could do buttons and buttonholes.  Without that overlap, it ends up just a little big on her, but not so much that it looks silly, I don't think.  So, if you decide to do an exposed zipper, consider that you'll need less room than buttons/buttonholes.  If you do a normal zipper, or invisible zipper, it will work out closer to normal, because of the way zippers are installed.


And then it was time for the skirt...  I decided to show off my underskirt by adding one ribbon pickup to the skirt.  First, hem your skirt.  I decided about where I wanted it (I did 1/2way between the front middle of the skirt and the side seam), and sewed a line with a 5/8" allowance.

Keep Calm and Carrion PPD tutorial
Then I cut down the middle of that line, and realized that I hadn't given myself enough room to fold under the raw edge and still fit the ribbon I had chosen.  Meet my seam ripper...
 It's actually a pet hair trimmer that my amazing friend Kim (hi +Kimberly Odell ) sent me, and I find it's great for ripping out long straight seams... you'd think after this long I would stop making long, straight mistakes...
So I moved out my seam to a 3/4" allowance, and serged down both raw edges.  And then folded under, ironed, and stitched them in place.
Keep Calm and Carrion PPD tutorial

Then starting at the bottom of the skirt, thread your ribbon up through one side and back down the other, leaving long tails on both sides (I left 8" on each side and trimmed - I wanted to have enough that the skirt could be worn not gathered up if desired).  Now  just attach your skirt to your bodice.


Due to Inara's issues with seams, I decided the best thing for her was to do an enclosed waist seam.  Just attach the skirt to only the main fabric, and then fold the lining down over the seam, press and pin in place, and topstitch around.  You can whipstitch here as well if you don't want a topstitch on the outside, but  it went with the look I was going for, so that's what I did.  And you're done!

Tie Dye Diva Perfect Party Dress from Keep Calm and Carrion

 Inara totally loves the finished dress and had a ball modelling..

Tie Dye Diva Perfect Party Dress from Keep Calm and Carrion


Thank you so much for taking the time to check out my dress!  I had SO much fun working with this pattern and I'm really excited to be part of this tour.  Thank you to Kathy and Jen for doing this and for letting me participate!   Again, the dress is available 
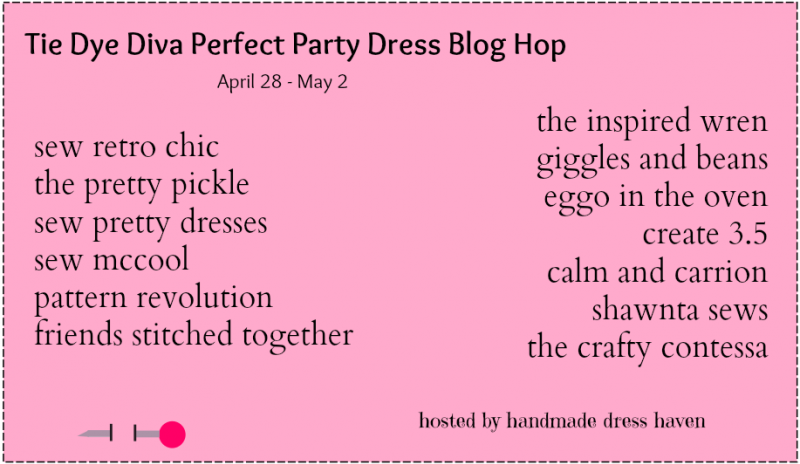
here in the Tie Dye Diva pattern shop.  I think this dress is definitely worth picking up and having some creative fun with!  Make sure you check out the rest of the bloggers on the tour as well: 


Thanks for stopping by!
The Perfect Party Dress from Tie Dye Diva by Keep Calm and Carrion
 HTML Map

Friday, April 25, 2014

Pattern Review: Girl's Skirt No. 5 from E+M Patterns

This is the second pattern I've sewn for Allison of E+M Patterns, and I actually have her first pattern printed and ready to review as well.  I really enjoy working with Allison.  She is cheerful, and receptive and her patterns are so very well written.

Girl's Skirt No. 5 E+M Patterns made by Keep Calm and Carrion
This is actually my pre-test muslin - the fabrics are from Kona Bay.

The details:
Available in sizes 2-10
Flat front, elastic back waist.
Optional underskirt
Instructions for making the garment with fully enclosed seams without a serger.

Girl's Skirt No. 5 E+M Patterns made by Keep Calm and Carrion
 This one is my absolutely favorite.  I thought there was no possible way a print like this was going to work, but Inara loved it and begged to use it, so I figured I'd give it a shot... And I LOVE how it came out.  She wears this one all the time. 

The pattern itself has no pieces to print, but includes measurements of the pieces that you need to cut out to make the skirt.  There are tools you really can't do without on this pattern -- a long ruler and masking tape. 
The skirt is constructed with two big tucks, and you'll need a ruler to measure up to mark the second one (no Alyssa, your hem guide will not work when you  can't find your ruler, how is it that I only one one ruler?)
And the masking tape... The tucks are stitched further out than my machine guides go, so you can do a couple things here... draw a line with tailors chalk, FriXion pens, etc all the way around to follow, pin a line around to follow, OR do what Allison suggests and put a piece of masking tape on your machine to mark it. 

Girl's Skirt No. 5 E+M Patterns made by Keep Calm and Carrion
I have no idea what she is doing here....
If you can't tell, I don't have a lot of solids around the house... and since I'm doing another set of 100 items before shopping (actually it was supposed to be 50, but I am closer to 100 now, so I figured I may as well go for the push...), I didn't want to go shopping if I could make prints work with this pattern.  I'm actually totally thrilled with how all of the prints work with this skirt.  This is a cool digi-looking floral print from Blend Fabrics.  And it is soooo soft.  I think it shows a cool versatility of the skirt as well. 

The skirt also has an optional underskirt with it.  Which adds a really cute *pop* to it. 


I decided to use the same print for the waistband and the underskirt here to pull it together.  I think it works well.  The floral print was just so pretty that I didn't want to pull too much attention from it. 

Start to finish the skirt took me maybe 40 minutes without the underskirt, and 45-50 with the underskirt.  You can gather the two skirts together like I did here, but just running your gathering stitches through both skirts at the same time, or you can do it separately if you're worried about popping threads.

The pattern itself is so clearly written and is easy to follow and I really can't rave enough about how cool I think it is that Allison takes the time to explain step by step how to make your garment look totally professional without the use of a serger.  

All of her patterns are available here in the E+M Patterns Shop!  Pick them all up while you're there ;)


Thursday, April 24, 2014

Something Jennuinely different... The Matinée Dress and Peplum Tour


Sometimes when I see a tester post I think ... " And now for something completely different..." <yes that is a terribly dorky Brit pop-culture reference>.  This was one of those times and I crossed my fingers and hoped to be chosen.  And figured, even if I wasn't, this dress was going to be added to my pattern collection.

Jennuine Design  - The Matinée Dress and Peplum

First, let's start with the details, and then I'll gush a bit...

Available in sizes 12mo to 8yrs
Cap sleeve or sleeveless options
Peplum or dress length
Optional contrast hem band for the dress.
Side seam pockets on the dress option.

AND... the coolest detail...
The pattern pieces... are layered.  What does that mean?  It means that you can click on the layers button on the side bar, and select only the size you need to print.
Jennuine Design  - The Matinée Dress and Peplum

I'm sure that there are other patterns that have this, and maybe I'm totally blind, but this is the first one I've seen/used with it, and I totally love the layers.  No concern that my tired eyes will make me cut the wrong line where things intersect.  It's pretty sweet.

For the test I got picked to make the peplum version.  I selected *either* on the questionnaire, because I knew I'd want to make both either way.  Inara and I scoured the stash for quite a while to choose fabrics that we wanted to use for this one.  The suggested fabrics didn't include satin, but I REALLY wanted to dress up my top with it, so I went for it, and it totally works.  The accent print and lining are a random Michael Miller print that was hanging out in the purples.   If you decide to go the satin route, I highly recommend adding a strip of interfacing between the layers in the back where your buttons and buttonholes will go. 

Jennuine Design  - The Matinée Dress and Peplum

Note: Most of the photo shoot went like this.  Connor is rocking one of his Little Kiwi's Closet Rockstar Raglans with his Agathe and Theo Slouchy Pants from Filles a Maman and would NOT get out of the way, lol.


My absolute favorite part of this pattern - the back <swoon>.  Inara is at the very bottom of the size 6, and after this round of testing, the bodice was reshaped slightly at the bottom too, to help remove that little gap.   The back is closed with three buttons - two on the bottom and one on the back strap.  Totally elegant... and fun enough to play in!


We always dress up to dig for fossils.

And then I decided to make the dress... and Inara used her new makeup kit from the Easter Bunny to match. 

I still went sleeveless, since I wanted this to be suited for all summer.  And I used the optional hem band.  Again, Inara is at the VERY bottom of the size 6 on the chart (she just makes the chest measurement, but height, she is pretty much still a 5).  I decided to go with a straight 6 so we would get a little more use out of it.

And the absolute best part of this dress?  I used some of my very awesome TARDIS snaps that I do a lot of staring at and not using.  They totally made this dress perfect.  


Thoughts on the pattern itself.  It's well written, with clear and easy to follow instructions.  The illustrations are computer drawn and all very clear to go with the steps.  I had no issues following along the pattern.  The sizing is accurate with the included chart, and the layers will make it easy to mash two sizes together.  The finished product looks professional and is well constructed.

The pattern is available in the Jennuine Design Etsy Shop and the Jennuine Design Craftsy Shop and is on sale through Friday for $8 (Etsy code is MATINEE20, sale price is already set in Craftsy).

Make sure you check out the other stops on the tour!


Wednesday, April 23, 2014

Pattern Review: The Perfect Puzzle Set from Hailey Bugs Closet

First, I have to say, I love the look of upcycles.  I have a Facebook friend who makes these amazing outfits and I like to ooh-and-ahh over them, but I don't make a lot of them.  Then I saw this pattern and I knew I wanted to try!

The Perfect Puzzle Set from Hailey Bugs Closet


Inara can go zero to complete melt down over an itchy seam in about 2 seconds, so I was excited to try something that would put most of the seams on the outside... And let me tell you, it totally worked.  All three outfits have gone right into the "wash and wear" area of her closet.

The details:
Available in sizes 12mo - girls 11/12
Sleeve Options: long, short, sleeveless, and layered long sleeve.
Separate skirt and shirt or dress options.
Paneled skirt (pattern pieces for 8 panels, tips at the end for making more panels!) or half-circle skirt.
Ruffle option on dress (required for skirt - or it ends up shorter)
Instructions for making patchworked bodice included in pattern.


First I did the shirt/skirt options.  It's still cool here, so the long sleeves were perfect for early Spring in the Pacific North West... but I wanted to do something a little more fun than the plain long sleeves, so I did the layered sleeves.  I picked out the shirt (clearance at Walmart) for the first one and Inara picked out *all* the fabrics I used.

The Perfect Puzzle Set from Hailey Bugs Closet
I did a variegated rainbow thread rolled hem on the bottom of the ruffle of this one. *NOTE* This is the shorter panel length, which is not recommended for the skirt or it will end up shorter than intended in the pattern.

Of course we had to test the twirl...

The Perfect Puzzle Set from Hailey Bugs Closet


She loved this one so much, I jumped on making her anther the next day.  This time she chose a rockstar theme.  We scavenged goodwill for a cool shirt and any other prints we could use with this next one, and this is what we came up with:

The Perfect Puzzle Set from Hailey Bugs Closet
Cue traditional rockstar pose...
Here is what's cool about this one... The man panel on the bodice, the short sleeve, the top of the bodice, and small panel above the main print, and the black, pink stripe and cheetah on the skirt... ALL shirts we snagged at Goodwill for 50% off.  The guitar fabric and the polka dots had been warming my shelf for a while and finally found their home.

I want to show off the waistband here, so you can see that even that seam can be put toward the outside to avoid itching meltdowns. How cool is that?

And after the testing period ended, Stacey announced she was adding another option and I begged to play again..  (I really like this pattern).  Sleeveless... perfect for Summer (if it ever comes).  AND I found a use for my last couple of scraps of Unicorns In The Rain... 


From start to finish (not including time taken to choose fabrics), this one took me about 45 minutes, and that included the piecing and cutting of the bodice parts.  The shirt/skirt long sleeved ones took maybe 10 minutes more (making the waistband, threading the elastic, sewing the sleeve seams, etc).  So once you're done dancing around picking and un-picking fabrics for and inordinate amount of time that I will not admit to... you've got a gorgeous outfit in about an hour....

The pattern is available here in her Etsy Shop.   The code UPCYCLE gets you 15% off all patterns in the shop until Saturday!

Monday, April 21, 2014

*Free* Fox Coin Pouch from GYCT

I hope everyone had a Happy Easter.  The kids seemed to enjoy theirs here.  Then they all went sugar crazy for a bit and I retreated to my sewing room to avoid the shrieking.  The little two are loud on their own, but add the older two, who don't have the patience to deal with the little two, and really, it's just better to retreat to my sewing room...

Last week Chelsea of Get Your Crap Together asked for some help testing out a new *FREE* pattern she was going to add to her shop.  I jumped on it, partly because I clearly don't have enough going on (lol) and partly because I really like Chelsea's pattern and it's fun to test something different than clothes sometimes....AND lastly because Connor saw the picture and begged, lol.

A little background.  Connor has two favorite songs... The Gungam Style/2 Legit mashup and The Fox Song...  We listen to the Fox Song... a lot.  For a while I was gauging distances around town in "Fox Songs."  It takes 9 1/2 fox songs to get to the pool.  It takes 2 1/2 Fox Songs to get to McDonalds. 

So when he saw this he HAD to have one... so Connor's came first... and then Miss Princess demanded one of her own, but "girly."

Fox Coin Pocuch from GYCT
I used my applique stitch to attach the muzzle, nose and ears, and some random detail stitch for the eyes.  I think I put the eyes too high on Connor's (whoops), but he loves him.  I also added a ribbon into the side seam for Inara's, so she could carry it.

The pouches close with a zipper:

Fox Coin Pocuch from GYCT

Which is explained nicely how to attach, and you flip it right-side out through the zipper hole, so no topstitching any seams after.

Connor loves him...

He carried him around the rest of the day, took the coins from his piggy bank to fill him up, and even slept with him.  It's been 5 days, and if we loose Mr. Fox for more than 5 minutes, it is a tragedy. 

Inara on the other hand... is, well she's a particular child... And despite picking all her fabrics and the ribbon, she decided it wasn't her style and she was going to send it to Aunt Diana.  Cause my Sister-in-Law totally needs a fox coin pouch?  So I decided to play with the pattern a little... and see what I could make that she would like...

Fox Coin Pocuch from GYCT

Ta-da --- Fox turned kitty-cat.  And she loves it! Her coins have all been transferred over to it and she's happily clinging to it.  :) 

The best part?  You can totally make the whole thing with scraps you've got tucked into your scrap mess.!!  Awesome way to make the Fox lover in your life happy and start paring down the scraps!

The pattern is available here in her Craftsy shop  and definitely check out her patterns while you're there!

And check out Chelsea's blog for the full story on her cute new freebie!


Thursday, April 17, 2014

Last minute Easter idea: Little Bunny Poo Poo

Did the make your heart race for a moment?  Usually, by this close to a holiday, I have all the presents/supplies/etc purchased, wrapped/packed, and ready to go.

This year? I haven't even picked up our egg coloring kit yet!!

So if you happen to be a little behind (like me), and need an idea of something fun to make for the kids (like me), that won't take a ton of time because you have this crazy to-do list (like me).... I've got a solution! I've been sitting on this pattern for a couple months, looking for time to make it, and crunch time is always a good time for me. 

Little Bunny Poo Poo  is a cute, funny little treat bag from Cozy Nest designs.

The details:
Pattern for 2 size bags
Printable pattern pieces for some design aspects, measurements for rectangles required for bag.
Lots of cute embellishment ideas.

Okay, to start, you'll need three or four fabrics... I decided to do my bag and lining in the same print, so I didn't need a second print. And a small scrap or two for the eggs. I used a green batik for the grass, but you can use something fuzzier to give it more texture as well.  And I used a white rosette minky for the bunny.  (You'll also need some Wonder Under and leftover batting, but we'll talk about that in a bit).


First of all, this was my first time actually using the rosette... man does that stuff shed!  I ironed a scrap of interfacing to the piece I cut the bunny tail out of in hopes it would stop drowning me in fuzzies.  It sort of helped... a little.  The piece for the bunny's body, I ironed my Wonder Under (or your Heat n Bond, or whatever you use to fuse stuff) on first, then cut.  I did the same with my grass piece and eggs.  This makes it easier for me to position the pieces, and not have to mess with weird shaped pieces of flimsy Wonder Under. 

I chose to blanket (satin) stitch my grass and eggs down before attaching the lining, as I wasn't overly confident in my blanket stitch looking good through all the thickness afterwards. 


If you are not a quilter, this next part will probably be the trickiest, but I thought about it a bit, and I have a work around for you.  The detailing of the bunny, and the words on the bag are FMQed on.  My FMQ is pretty iffy in general, but I really do enjoy doing it.   And I think it added a cool detail to the bag. 

 **If you are not a quilter/don't want to quilt, have no interest in the FMQ aspect... Here is what I would do.  The pattern calls for batting to go between the main layer and lining.  Instead of batting, I would use a fusible fleece, and don't clip it out of the seam allowances like the pattern calls for.  Then once you fuse it on and baste the lining, you can do your stitching around the bunny, eggs, and grass.  And that's it... no quilting required.  :)

I did find one typo, and sent a message to the designer, who responded quickly and was super friendly and helpful.  I point it out here, because if you have the pattern already, and work off it before she gets a chance to fix it, it may be confusing.  Step 22, should refer back to step 12.  You'll understand when you get there.  :grin:

If you do like the quilting idea, then go with it! Have fun... Here's what I did on the back of the bag... nothing fancy, just some mushrooms and swirls. 


The flap for the bag and closure at the top are explained clearly and are easy to follow along.  If, like me, you used a fuzzy fabric for your bunny, you may choose to skip the bunny fabric for the exterior door... I did... I used the same color as the grass, and just made sure that my tail covered it well.

Here is my finished bag:

Little Bunny Poo Poo from CozyNest Designs
We didn't have any jellybeans in the house (remember, I have not done my Easter shopping yet!), but we did have some gumballs, which fit perfectly through the hole as well.

Start to finish (including printing, pattern cutting, fabric cutting, and staring at it for a bit to decide what to FMQ):  90mins.

And I am not speedy by any means.  Both kids got a total kick out of it and Connor sat and snuggled it for the evening. 

With any luck, I can squeeze 3 more of these in before Sunday, as I'm pretty sure that all of the kids will love them.