Friday, February 28, 2014

A letter to the testers of PDF pattern land

I've been stewing on this post for a while now, and trying to find a way to word things, so that people reading it aren't offended, but I think it's better to just be blunt about it.   Plus, tact has never been my strong point.


Say hi to my models: Inara and Connor.  Invariably one of them is not looking at the camera.  But the thing to focus on here?  See that strange contraption on Inara's head?  It's a ruffle.  It is in fact the original ruffle collar from the shirt she is wearing.

The shirt is the Soda Pop Polo from Candy Castle Patterns.  It may not look like much, but the designer took 1/2" of the width because when I got done and posted in the tester group, we chit-chatted about it and all decided it was a little wide.

Why do you care?  Because, I had a couple options when I posted this.
Option one:  This pattern is amazing! I love everything about it!
Option two:  I love this pattern, but I think the ruffle is a little wide.

What's the difference? 1/2".  But oh so much more than that.

I love testing.  For me, its a lot of work, and I feel like testers should understand that going in. If you want a free pattern, enter a giveaway.  This isn't how you should get them.

So here is my advice if you want to test.
1.  Be prepared to be in it for the long haul - some patterns take a week, and are ready to go.  Some take a little more love.  When I start a test, I know that that window is flexible and I understand that I may be making more than one of the pattern.

2. If it is a fitted pattern, or something different than the designer usually puts out - MAKE A MUSLIN!  I feel like this step is lost a lot amongst seamstresses now.  You don't actually have to use muslin.  You can grab clearance stuff from Walmart for $1.50, and then if it turns out to fit, you've got a cute print (win-win), and if it doesn't, oh well.  This is a great step to use when you're making a new pattern by an unfamiliar designer as well.

3.  Be a proofreader.  When I get a new pattern to test, the first thing I do is sit and read through it with a cup of coffee.  (The coffee is important for me lol)  I go through page by page and read carefully for typos, grammar, syntax, and general understandability.   I keep a little pad and pen next to my laptop to write down my notes as I go.  Depending on the designer, I either start a thread in the test group and post my findings, or just wait until feedback time and fill it out in the form.  If there is anything glaring that will affect testers' ability to construct the garment, I let the designer know right away.  Just think, if you were there to proofread, would Rachel Ray look just a little less crazy??


5.  Measure the test square.   Minor detail, completely important.  If your square is wrong and everyone else has it right, then reprint.  If you measure and it's wrong, and everyone else goes to check and it's wrong.... think of what would happen when the pattern is released.  People will buy it and everyone will either resize to make it correct, which will make the fit of the garment wrong, or they will think poorly of the designer. 


This box needed a cupcake, he was a little thin.


4. Follow the directions.  Sounds silly, right?  Look at it this way.  How long have you been sewing?  When you sew pants, they generally go the same basic way, so you just jump in, right?  Don't do this when you are testing.  Follow along each step.  Make notes if a step is confusing, worded weirdly, or if you think there is a better way to do it.   These are all important things to tell a designer.  If I have time, I like to go through a pattern twice: once to follow along the words and once to follow along the pictures.
Chapsters from PetitBebe
This way you can make sure that the directions will be clear to people who are better with written instructions and those who are more visual.  If something is constructed differently than you would normally do it, let the designer know.  Maybe it didn't occur to them that there was another way to do it.

We all like to make embellishments to give that unique touch to our creations... Make sure you ask the designer before you do this! Changing the pattern isn't what testing is about.  Use your fabric and crazy skills to create a gorgeous garment, and if you want to embellish it in any way, ask the designer first. 

If you don't follow the pattern, you aren't testing it, and really, what help is that to the designer?


Panel Pants from Little Kiwi's Closet
5.  Take lots of pictures.  I am by no means a professional photographer.  In fact, even now with my new camera, I'm still pretty meh.  But I do my best.  I get clear shots of the kids.  I make sure you can see the fit, and if there are any problem areas, you should take close ups of those.  And I like to try to get some fun action shots in when the local rainy weather lets me.

Canaan's Incredible Blazer from MLPC


 6.  Verify before making recommendations.  When I sew pieces and they don't line up right, I stop and go grab the actual paper pieces and a ruler.  I measure the difference in my fabric and make sure that the same difference is there in the pattern pieces.  When I post the pic or email the designer I can then say "piece A is 1/4" shorter than Piece B when aligned at the top.  I verified that the pattern piece itself is shorter as well, so it wasn't a cutting error." 

7. Give honest feedback.  This to me is really important.  There is always feedback to be given.  Whether its too short, too tight, too long, has an odd construction method, etc.  Do not be afraid to tell the designer when you have a problem.  I look at it this way.  If I tell a designer where I see any issues, and the designer blows me off, or gets offended, than it probably isn't a good designer-tester relationship, and I would rather not test for a designer who doesn't take feedback.

8.  If you've gotten to the end of the test and you say "no issues" you should go through it again.  I have tested for a couple more experienced designers and a couple newer ones.  And I have not once tested a pattern that didn't have at least a typo or two.  Or maybe a line missing on a pattern piece.  These may seems like small things, but will help the designer and the pattern look more professional in the end.  And don't you want to be part of a GREAT pattern, not just an okay one?

 9.  If you aren't sure if you can finish the test, don't sign up!  No matter what, you end up with a free pattern, even if it is only the tester version.  So if you are short on time, or the pattern is something you aren't sure you can sew, or even if you don't have a model you can get to in time - talk to the designer first, and see if they are still okay with you signing up.  A lot of designers want sewists from different skill groups to test their patterns, that being said, if you just picked up your first sewing machine last week and someone does a tester call for a clearly advanced pattern - you may just want to wait to see if it goes on sale when it's released. Missing a deadline is never okay in the professional world, and that's what this is.  Even if its a hobby for you, it is the designer's profession.  We all understand that things happen, but in all the testing I've done, almost every test has had at least one tester drop out because they are too busy or miss the deadline with no explanation.  Neither of these are good reasons to miss a deadline, and in the long run, you are destroying your credibility with designers, because they all talk. 


Designers, thank you!  I've had some amazingly positive testing experiences.   And sometimes I watch the testing process and feel for ya'll.  There is a leap of faith sending a pattern out to a group of strangers and hoping they do what is needed.  And I see tons and tons of people sign up for tester calls, and I'm not sure everyone understands the work that is involved in being a tester.  A suggestion for you all?  Continue to be receptive - make a tester group and let testers have a place to post questions and issues as they go - and be interactive with them.  Maybe next week I will pen an honest post to you from me of what I'd like to see as a tester. 


Wednesday, February 26, 2014

Pattern Review: Agathe and Theo Slouchy Pants

I hope everyone is having a more productive week than I am!  I feel like I am constantly playing catchup this week! Eep.

I decided to sit down and take some time to write this review though, because I love these pants and I think they are the cutest things. 

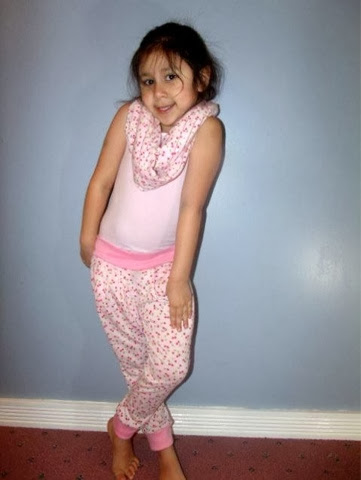
Say hello to the Agathe and Theo slouchy pants from the amazing Melanie from Filles a Maman.  Melanie is currently being featured as part of the Aspiring Designers Challenge over at Pattern Revolution.  And I have to say, if you haven't checked out her patterns, now is a great time to do so.


For these I used this awesome cherry print knit (cotton-poly blend by the feel of it), and a pink ribbing for the cuffs and waistband.  I love that there is no elastic in the waist of these pants - it makes them so comfortable for her to wear, and the sizing is great, so they stay up nicely.   They were a fast and easy sew, so I decided to whip up a small pair for Connor as well.
How's this for a cooperative model.....
 For Connor's I used this tiny piece of awesome Ninja knit I had hanging around, and used a cotton-lycra for the cuffs and waist.  In case you were wondering, they are perfect for dancing in.  Look at little man shimmy:


I was a little nervous about the pleats when I started the pants - details that I don't have a ton of experience with always make me nervous - and pleats on knit were pretty new to me... But if you just take a breath and trust the instructions, it actually comes together very easily!
And they make the cutest detailing to these pants.  I was a little worried about them being too girly, but once I made Connor's,  I was totally sold on how unisex they were.
Start to finish (including printing, taping, cutting) these were an under 90 minute sew (and remember, that's with my munchkins all over my sewing room!).  Mel was a complete sweetheart to work with, and I would happily test again for her any day!

The pattern is available here and on sale for $7 until the 28th, so don't miss the awesome price and grab them now! These are taking a prime spot in our Spring wardrobe!


Monday, February 24, 2014

Pattern Review: Old Tyme Baseball Shirt from Dandelions n' Dungarees

First, a shout out to the lovely ladies at  Dandelions n' Dungarees for the opportunity to test this awesome pattern, and a congrats on being featured as an aspiring designer on Pattern Revolution.

There are so many patterns out there for little girls, that when you see something super cute and original for the little men in your life, you jump on it.  I signed up to test for Connor, and then when they were short on a little sized tester, I jumped on one for Squishy (my nickname for my friend Heather's cutie pie).

The size range on this one is awesome too - it's available in three size bundles
1. NB -18months
2. 2T - 7
3. 8-16

Or for extra savings you can by two sizes or all three!

Mom, leave me alone, I'm not modeling, I'm eating puffies.

This was a very enjoyable testing experience, which to me says a lot about a designer.  April from Dandelions n' Dungarees was responsive and involved and the test group had a lot of fun going through the pattern.

The options that you have with this pattern are great too.  Buttons or Snaps.  Contrasting fabrics.  And the piping detail makes it look so professional.
Ignore ugly me in the background - how cute is Squishy???
For both sizes I did 100% cotton fabrics, but the pattern works well in a cotton-blend if you are looking for something that won't wrinkle.  One of the testers even did it in a low-stretch knit and it came out darling.

Gavin's shirt is made from a gorgeous deep blue cotton solid from In The Beginning fabrics.  I used a bright yellow piping to contrast and added an anchor applique as a nod to his Coastie daddy.  And, because for small wiggly babies, snaps are a little easier, so he got matching bright yellow snaps.


And for Connor who is in a Curious George phase (I think we've seen every episode on Netflix at least 10 times now), I had this small piece of Curious George fabric left.  Since I'm still working through my 100 items challenge - slow, so slow and painful, I couldn't really justify buying more cottons for the tester, and it was just so perfect, so I came up with a great workaround.   I used the remains of the George print for the front and cuffs.  I used a matching red solid for the back and sleeves, and added a dark blue piping.  And I splurged and bought these really cute baseball buttons to match!


The fit on the shirt is great - its winter here, so we tossed on long sleeved shirts under them, and they fit perfect - if only I could have got one of them to hold a bat as well.  But then again, my crazy little man with a bat... yea, that just sounds like a bad idea.


The pattern is well written and the instructions are clear and easy to understand.  The pictures within the tutorial are great for those of us who are more visual as well.  And, despite my initial confusion when I read how to attach the facing - I tell you, just go with it!  The final result  is a professional, well constructed garment. 


The pattern includes the note to put the buttons on the opposite side if you want to make it for a girl, so don't think this one is just for your boys either!  And, as we are heading into Spring - its getting time for baseball, and you know the sports lovers in your life will flip for this pattern!

So run over to their site and pick up the Old Tyme Baseball shirt today!


Keep and eye on this designer - I definitely see lots more awesome patterns to come!


Saturday, February 22, 2014

Nothings Gonna Change My World... except Project Quilting Challenge 4

It's snowing!!!  That has absolutely nothing to do with the rest of this post, but its nearly the end of February, and all we've had here is a light dusting like a month ago.  Sadly, I've been peeking out all morning, and its doing very little actual sticking. 

Well now that the PNW weather report is out of the way.... guess what time it is??  Project Quilting time!  It's challenge #4 for season 5, and I am really getting into the swing of this, I think.  My quilting still leaves something to be desired (skill? talent?), but it's steadily improving.  AND my cursive hasn't had so much practice in like 15 years. 

So this week's challenge?  Across the Universe. 

Those of you that knew me in way-back-when know that I LOVE The Beatles.  I went so far as to collect most of their albums on vinyl.  Which means, as soon as I read the challenge, I was singing this song in my head pretty much non-stop.

It's been kind of a long week here, trying to catch up after being sick, and I wasn't sure I'd actually get to it, but I kept coming back to the challenge, and finally on Thursday I was slightly less behind and decided it was time to get to work!

One of the amazingly talented people who run Project Quilting showed her "sneak peek" and I got a little nervous, since she was clearly doing the song, and there was NO way I could even compare to her talent, but I knew I wouldn't be happy if I took the theme any other way. 


So after gathering a little helpful advice from my friends (thanks Lisa, Deb, and Kim!), I drew out my first sketch.  With im inspiration the following line from The Beatles song Across the Universe:

"Limitless undying love, which
Shines around me like a million suns,
It calls me on and on across the universe..."

Keep in mind, I can't even draw stick figures...


 I'll give you a minute to stop laughing...

Done? No?  Okay, one more minute.

 Okay, now that you're done laughing at my complete lack of artistic abilities... I laid out my plan in fabric (a much more comfortable medium for me). 
Anything space related is better with a TARDIS, right?
I added a sun to the TARDIS and the floating person, and then appliqued and stuffed them all...


So once I got it all together it was time for some FMQ.... which is sort of not my strong point... but I think this came out pretty good.  After some squiggles on the purple (see above) and some wavy lines on the music print... I twas time to do something with the space area....


  This is where my very rusty cursive skills came into play.

I actually had to stop and write out letters a couple times because I wasn't sure I was doing them properly.


And here is my finished wall hanging.... which is going right above my bed... as soon as I go get a rod to add to the top and bottom.  I am calling it Undying Love.


I want to send a special thank you here to my friend Kim at Sew and Tell with Mama Eggo for introducing me to this challenge, and forcing me to work outside my comfort zone.


Saturday, February 15, 2014

EYMM Kenzie Dress Blog Tour!

blogt

BLOG TOUR DATES:

2/18 bebelambs


Happy (slightly late) Valentine's Day! I hope everyone got some good snuggle time with someone!  Mine involved a quick dinner out in our tiny town and two small ones insisting on being in the middle of any cuddling, but hey, small cuddles are good too. ;)

So I am REALLY excited about this post.  This is my first time being part of a blog tour and though I am completely nervous, I'm also really thrilled to be able to participate.  I've been slowly amassing a nice collection of patterns from Everything Your Mama Made & More! that are going into my "these will totally flatter the post baby bump, yes I know he's 1 1/2, that's not the point, now I just need time to sew for me" folder.  And when Kenzie's Party Dress came out the ideas swirled and swirled.  What a COOL dress, right?  

The important stuff:  
It is available in two size groups NB-4t and 5-18.  
There is also an 18" doll dress add-on available
OR you can purchase it all in one bundle at an awesome discount.
It can be made as the "Signature style" with all the flounces.
Or as a simple dress, which makes a perfect fancy party dress.
It has Cap sleeves or sleeveless options.

Or skip the dress and make a gorgeous high-waist skirt with or without flounces.

We chose the sleeveless signature style dress, I say we because you KNOW Inara was involved in this from step one...
What she is actually saying is ONE PICTURE, mom. 
When Kymy said the theme was "Spring," I decided to ask my friends what came to mind when I said the word "spring."  In case you are wondering, in the Pacific Northwest, it means "rain" to most people, though I got some great flower ideas from friends around the country.  Then a friend mentioned cherry blossoms, and the ideas started swirling.  Though I'm here now, I am a displaced NYer and the short drive to the Cherry Blossom Festival in DC is totally worth it... it's just gorgeous... and really, the blooming trees, the falling petals...  it just screams spring.... so that is what we were going for...


 Inara is a pretty standard size 5, so we didn't make any alterations to the bodice and the fit is perfect.  I wanted the skirt to look like falling petals, so I chose a drapey pink sheer from the fancy fabric aisle at my local Jo-ann and used this gorgeous Cherry Blossom print from Kona Bay: 

I was a little worried that it wouldn't show through, but I think the effect works...
The underskirt is a little short, with the bottom layer being sheer, but she wears playground-pants or leggings under her dresses anyways, and it just hangs sooooo pretty... I might eventually add another tier of underskirt when it gets warmer.  

I used these cute little snaps that had flowers on them, just to *extra* coordinate, lol

This pattern came together much faster than I expected, though I imagine that the rolled hem on the flounces made it faster then hemming them all.  The instructions are clear, and easy to follow, and the pictures make it so someone like me, who likes to just glance at photos, could follow along without any issues...
This is clearly a good dress to play football in.
 The only other changes we made were the added embroidery to the bodice -- by the way -- embroidering on satin was an interesting experience... I made the sash 8" wide, so it wouldn't cover my embroidery (after all that effort it NEEDED to show) and I changed the placket to the method I usually use... which looks like this:
This is on the doll version
And all of those changes were total personal preference.  The pattern contains every step by step construction method needed to create a  gorgeous, professional looking garment.  
And of course dolly needed one too...the doll add-on is totally worth it as well.  The pieces fit well and it goes together super fast. 
Dolly asked for a shorter dress, so she only got 2 flounce layers.

 I definitely see more of these in our future... even with all my interruptions, I still cut and finished both in one (late) night.  Which for us, is pretty darn good.  (Thank you Justin for taking the kids to Walmart while I cut pieces out!).


And of course the most important test of any fancy dress?  This one passes with flying colors... THE TWIRL TEST!

So one more time, you can get Kenzie's Party Dress here.  You will definitely not be disappointed in this pattern!

Make sure you pop over to see Lydia's gorgeous dress at My 3 Little Kiwis
And check out Confessions of a Barefoot Housewife's stop on the tour tomorrow!

A huge thank you for everyone who stopped by to check out our dress, and another huge thanks to Kymy from Everything Your Mama Made and More! for letting us be part of this awesome tour!

Tuesday, February 11, 2014

Pattern review: Tulip Tunic and Dress from Heidi & Finn

I was very excited to get chosen to test for the new pattern from Heidi & Finn.  My friend Megan saw the tester call and was like "look look!"  I was like, nah, there is no way, but then I got the awesome email and may have squealed a little.  H&F patterns are gorgeous - clean lines, modern chic look, totally perfect for my dress loving, but not frilly little girl. And they might remind me a bit of home... I have a whole NY Chic outfit planned for her from their patterns...

The Pattern:  The Tulip Tunic and Dress is available here.
Sizes: 12mo - 12  (can be purchased all together or split into 12mo-5t and 6-12)
Includes: digitized pattern pieces (noting direction of stretch) for all pieces except the collar which is given in measurements, clear, easy to follow instructions with full color images that are easy to follow.

The pattern started out as just a Tunic, which is perfect for over the leggings that little miss wears all the time, since she hates jeans, and I'm a meanie mommy and won't let her wear just skirts in winter.

First run of the pattern:
15 minutes printing and taping and cutting pieces (okay, I may have been watching Bones re-runs too)
15 minutes cutting out fabric
40 mins to sew (again, I may have started another episode... )


Main fabric is a lightweight jersey knit and collar, cuffs and bottom band are poly/cotton ribbing.

 The knit was a little slubby, and thin, so I wanted to see how it looked in a nicer weight knit.... 

Second run through...30 minutes to sew <clearly Bones is a bit distracting for me....>


I pulled out one of my custom prints for this one, and I am so glad I did...


This one is a cotton/lycra body, cuffs and collar, and bodice/sleeve and band are in a cotton interlock.


 AND I still have like 1/2yd of this awesome print yet for future use!!!


 *Note: I do not recommend an interlock band at the bottom, as the recovery is meh.


Inara knew exactly which fabric she wanted for the main print of the third one, and I do say, she made a good choice.  I love this print, and I had been hanging on to this last piece of it, sort of waiting for something to jump out at me.

So tunic #3 is done in an interlock bodice/sleeve, sort of a baby rib main, and cuffs, collar and band in ribbing.


All in all, we love it,  the instructions are clear and easy to follow, the finished product looks professional and we have received TONS of compliments when she wears them out.  Best compliment:
Lady in town: where did you buy that top?? My daughter would FLIP?

Inara: My mommy made it; its one of a kind.

I always ask Inara before signing up to test things for her, and this one was a huge YES right from the start.

Then when were given the option to test this as a dress, I jumped on it.  She loves dresses, and knit dresses are so nice and comfy, and the pattern combos made this just such a huge yes for us.

As a nod to the pattern name, we made the first one in a pretty tulip jersey knit, an interlock sleeve/bodice, and cuffs and collar in a bright spring green cotton/lycra.

Can you tell she loves it?? I may have taken the hem up slightly more than I intended to on this one, but its winter, so she'll wear leggings under it. What I discovered though, was that I had spread my gathers out across the bodice and it made the tush area poof a little on the dress version, which it didn't on the tunic.  She's got a bit of a butt on her, but can you see where it poofs? 


I wanted to see if I had done something weird, or if it was the way I did the gathers, so I sewed up one more, and this final one has taken its spot as current favorite dress.
When I made this one I basted it with the gathers spread, and found that it was my gathers causing the poof, so I took it apart and pushed the gathers more toward the middle, which totally took care of any tush-poof.  Only one or two other testers commented that they had the issue, so it may be in part the type of knit you use as well?  Anyways, if you make yours and have some poof, there's how to fix it!


^^  This is the face of a totally happy little girl!

Sometimes you have a testing experience that goes sort of meh, this was NOT one of those times.  Christine was responsive, helpful, and involved.  She took all feedback and promptly made any needed changes.  I feel like a positive testing experience says something important about a designer, and Heidi and Finn has made this experience great.  I highly recommend this pattern to anyone looking for a great, modern, well fitting top.  And, don't worry, I've already added some more to my Etsy cart (you should too) and will definitely be writing about more of their lovely patterns!

And a funny note to end on... Little man HATES when its not his turn for pictures... so he picked out his own outfit and pushed her out of the way....  He's got the posing down, huh?


Saturday, February 8, 2014

An oh so sweet step outside my comfort zone...

I decided this year that I wanted to make my best effort to participate in some of the Project Quilting challenges.  And, while I am pretty comfortable sewing anything in the clothing/bag/accessory realm... quilts are scary.  Yes, hush all you quilters, they scare me. 

When we were little (like 7 or 8) my Great Aunt tried to get us to quilt.  My younger cousin, who is pretty flighty, had the patience to sit there and do it, I on the other hand, got bored sewing square after square, and I wouldn't pay attention and my rows would end up all wonky.  But, many (many, many) years later, I have decided that I can do this this...

I made a quilt for my older brother's wedding, and I really enjoyed it, even though I found it insanely stressful, but I need the push to force me out of my comfort zone, so Project Quilting seemed like the perfect thing.

This week, Challenge 3, the challenge was Sweet Treats and you can read all about it here.

And, remembering, I am still in my 100 items (misery) challenge, so I shopped my stash.... and with help from Inara (as always), decided on:
GUMMY BEARS!!

I wanted to make it sort of like a nerdy pixel quilt, so I pulled up Powerpoint... and here is where you get to laugh at me...  Some very nice friends said the first one "sort of" looked like an animal:
The second one apparently looked like a fire hydrant: 
And lastly, we ended with this:
And then after some discussion, Inara choose a pink gummy bear with green and blue to go with the gummy bear fabric... so I colored it in... (and she wanted to color one too... her gummy bear as a star bow.  I'm kind of impressed with her use of Powerpoint at 5!)


In retrospect, I wish I had rounded off the tops of the feet like I did the ears and maybe extended the hands and rounded those off too.... but all in all I'm really happy with it....

So then to work... Here's progress when I had a moment of "do I REALLY need to put a border on?"
It did, I found 1/2yd of an orange that matched in my stash, and pulled that out too... I had to go buy batting, which I decided isn't cheating, because I couldn't finish without it.  But I did have a decent match for the backing:

Then I got down to pin.... and realized these were the only pins I had...


Which were slightly less than fun to work with (note to self, pick up bigger pins), and then on to the quilting... My walking foot and I aren't really on good terms, so it was a little slow going for the stitch in the ditch around the bear outline and the border:

 Am I the only paranoid one who does this every little bit?
It's really silly because my machine will beep and stop when the bobbin gets low, but I was paranoid that I'd run out in the middle of a swirl or something... After the boring straight lines did the the accents to make the bear look more like a bear, and then I hemmed and hawed a bit and decided to chance it and wrote out the quilt name "Icky Sticky Yummy Gummy" (Inara chosen) in FMQ...


<<- top left

 bottom right ->>


After that, some stitch in the ditch around the gummy bear blocks and add the binding... and TA-DA!! 


I will definitely play again for the next challenge!  Stay tuned, we've got a busy week around here!