Showing posts with label Tutorial. Show all posts

Wednesday, May 7, 2014

Pattern Review, Giveaway and Tutorial: The Rissa Roo's Pixie Summer Halter from The Plucky Butterfly Designs


Who needs a super fun summer top for their girl that is different, great for summer, and has a cute girly flare?  Everyone.  Okay, maybe just everyone with girls.  Pam from The Plucky Butterfly has created an awesome summer pattern for your little girl.  Meet Rissa Roo's Pixie Summer Halter.
Rissa Roo's Pixie Summer Halter by Keep Calm and Carrion

Here it is paired with the Surround Me With Love Twirl Skirt that is a staple in Inara's wardrobe. 

The details:
Available in sizes 2 - 14
Optional ruffle hem
Knit neck binding instructions included, but can be done with Fold Over Elastic as well.
Perfect for upcycling
 
For this one I used a t-shirt for center front panel, and the back, and some white interlock scraps for the rest of the front.  The binding is done in a red pique, and the ruffle is done in a matching red cotton/modal.  My kids love Miyazaki, so she is super thrilled with this one. 

The pattern is sized in even sizes, but it is really easy to customize the fit. Inara was sort of on the border, and if your child is on the border, I recommend sizing down.  Knits stretch and you don't want a baggy halter top!  The pattern pieces are easy to put together, and are clearly labeled for cutting.   This makes it really easy to mix and match sizes.  In fact, I may try a size 4 with a size 14 length for her to make a dress version!  


This fabric is one of my total favorite custom prints from The Fabric Igloo. I used a cotton lycra for the binding and the ruffle. This one is from earlier in testing, so it is more of a tunic length, which actually came out really cute.  Inara likes this one because she can wear little legging shorts under it and doesn't have to wear a skirt over them, since her tush is covered.  

Yea, yea, I know its weird, but when she wears leggings if her tush isn't covered by her shirt, I make her wear a skirt over them.  Otherwise her pants sag and everyone can see her butt when she's running around playing lol. 

 
This one is also an upcycle.  I used two t-shirts and some scrap cotton jersey, plus neon green FOE for the binding. What is totally awesome about this pattern is that it the back piece is shaped so perfectly that once you add the elastic in, it doesn't sag or gape on her at all.  She played all day at the playground in this one and never once had to pull it up or adjust it. 

Okay, so I know that some of you aren't totally in love with halter tops.  So if you're on the fence just because of the straps, I wanted to include this tiny tutorial to adjust the straps to criss-cross.  If you want to do this before completing your top, do it AFTER stitching down the back casing for the elastic and BEFORE inserting the elastic.  Also, if you think you want to do this, adding in a couple small scraps of knit interfacing before you sew the back casing down will help reinforce the buttonholes you are going to make. 


 On the back side of your halter measure in about 2" from the side seam (2.25" if you haven't sewn the sides yet).  Mark a line with chalk, a pin, FriXion pen, etc.  Repeat for the opposite side. 
On either side of your mark, work the elastic so its folded in half, and pin it out of the way.  (This is why it may be easier to do this BEFORE finishing the shirt).  On your sewing machine, find your stretch buttonhole stitch.  Make a buttonhole at each mark, so that end of the buttonhole is at the mark you made and the rest is closer to the center back.  These don't need to be huge button holes, big enough to get your straps though, but small enough that they won't pull back out.  I used a 5/8" button in my buttonhole foot for mine.  


 Now, you can just slip the strap through and make a knot, but I think these little bows look cuter... Make a loop with the end of your strap, and wrap it around your finger to tie into a knot.  Now the ends of your knots look like little bows and you have back straps on your top.


If you use a lighter weight knit, you may want to do the buttonholes at the bottom side of the casing (by the seam), so that it don't pull as much.  In this case, just fold the elastic in half toward the TOP rather than the BOTTOM, and follow the rest of the instructions the same!

Ta-da!

 So, if you were on the fence, hopefully you no longer are, as this modification is really simple to do.  The pattern is available in The Plucky Butterfly Designs Etsy shop for $6.95 for the next few days before it goes up to full price.   Or, check out The Plucky Butterfly Designs Shop to pick it up. 

And now for the fun!  Pam has graciously offered to provide a copy of her pattern for me to do a give away! So please enter my giveaway, show her Facebook page some love, and get sewing! 

**If you purchase the pattern now, and win, you will be refunded your purchase price!

a Rafflecopter giveaway

Monday, April 28, 2014

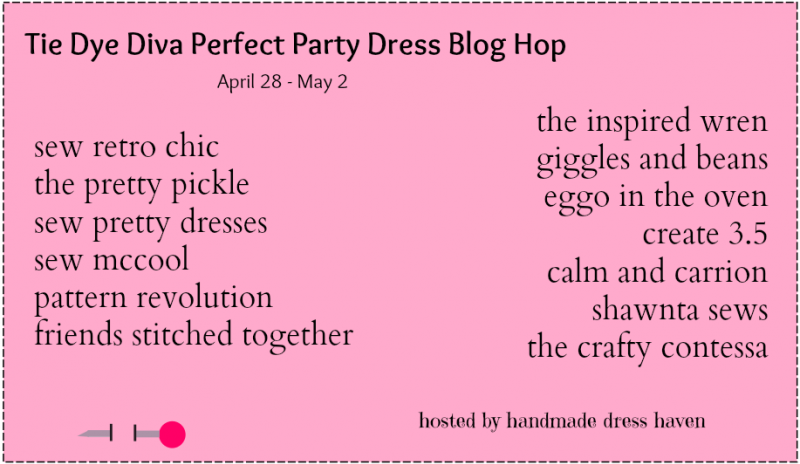
Tie Dye Diva Perfect Party Dress Blog Tour


I was really excited when Kathy of Handmade Dress Haven posted that she was looking for people to join this blog tour, and I picked up the pattern and got the wheels turning and sat there crossing my fingers hoping I would get picked.  <Disclaimer: While I purchased the pattern for this tour, there are affiliate links in this post to the Tie Dye Diva pattern shop>.  The Open Back Baby Dress has been my go-to pattern for summer baby gifts since last year, and I love it.  Jen's (the designer behind TDD) patterns are well written  with clear instructions that will help you create beautiful, professional looking garments. 

Tie Dye Diva Perfect Party Dress by Keep Calm and Carrion
Check out her shoes. 
 If you haven't seen the Perfect Party Dress from Tie Dye Diva, you really should check it out.  It's a great "blank slate" type dress that you can make fit any child's style. The pattern is available in two sizes 0-24mo and 2T-10yrs.  AND since you've come to check out our tour, you can get the pattern on sale for $6.00 instead of $7.95.  (Discount is applied when you add the pattern to your cart). 
Tie Dye Diva Perfect Party Dress from Keep Calm and Carrion


Inara as usual picked her own fabrics.  I sort of had an idea that I wanted a main and an underskirt, or a paneled skirt of some sort.  And I originally planned on doing a sash, so I told her to pick three fabrics.  I think she did pretty good.  They coordinate perfectly.  The white and black have these tiny tonal flowers on them that pick up the flowers in the main print very nicely.  I'm really starting to enjoy watching her process as she chooses fabrics.  She's way more natural at it than I am.

This was our muslin.  Clearly we needed some work. 

Keep Calm and Carrion PPD tutorial

I decided on a wider, gathered strap, and this was the point where I also decided I didn't want a built in sash, so when I cut out my final pieces, I used the front lining piece for main and lining. I also brought the front and back bodice down a little so that the strap would show better on the one side.  We used the size 6 and cut the neckline down to the lowest mark on the pattern.   Please don't mind my miserable scrap mess... I have a plan for it!

Keep Calm and Carrion PPD tutorial

 Once I cut out the pieces I cut down the side where I wanted the accent strap and repeated it on the back main and lining for that side as well.  I cut my accent strap 5" wide, sewed it in half to form a tube, and then lined it up with the bodice pieces to determine the proper length.  I then gathered the ends and attached it to the front and back as shown:

Keep Calm and Carrion PPD tutorial

 This was a little awkward when sandwiching to attach the lining, but it worked out:

When attaching the main to the lining, you do it like you normally would, but your back piece sort of hangs loose until you attach the underarm seam.  Be careful here to make sure that your strap isn't twisted before you attach the underarm.   I decided on an exposed zipper instead of buttons, because I had this lovely lace edged zipper that I wanted to use.  Before  attaching the zipper, I folded up the bottom edge of my lining 1/2" all the way around, so I could enclose the waist seam at the end. 

Tie Dye Diva Perfect Party Dress from Keep Calm and Carrion


**Here is what I did NOT consider.**  In doing the exposed zipper, I sewed the back seams like I would for buttons, so there were no raw edges.  Then I laid the zipper on top and basted to make sure it was straight and then stitched it on.  The end result is that the dress is a little big on Inara.  I choose the size 6 allowing for about 2" of ease in the bodice, so I could do buttons and buttonholes.  Without that overlap, it ends up just a little big on her, but not so much that it looks silly, I don't think.  So, if you decide to do an exposed zipper, consider that you'll need less room than buttons/buttonholes.  If you do a normal zipper, or invisible zipper, it will work out closer to normal, because of the way zippers are installed.


And then it was time for the skirt...  I decided to show off my underskirt by adding one ribbon pickup to the skirt.  First, hem your skirt.  I decided about where I wanted it (I did 1/2way between the front middle of the skirt and the side seam), and sewed a line with a 5/8" allowance.

Keep Calm and Carrion PPD tutorial
Then I cut down the middle of that line, and realized that I hadn't given myself enough room to fold under the raw edge and still fit the ribbon I had chosen.  Meet my seam ripper...
 It's actually a pet hair trimmer that my amazing friend Kim (hi +Kimberly Odell ) sent me, and I find it's great for ripping out long straight seams... you'd think after this long I would stop making long, straight mistakes...
So I moved out my seam to a 3/4" allowance, and serged down both raw edges.  And then folded under, ironed, and stitched them in place.
Keep Calm and Carrion PPD tutorial

Then starting at the bottom of the skirt, thread your ribbon up through one side and back down the other, leaving long tails on both sides (I left 8" on each side and trimmed - I wanted to have enough that the skirt could be worn not gathered up if desired).  Now  just attach your skirt to your bodice.


Due to Inara's issues with seams, I decided the best thing for her was to do an enclosed waist seam.  Just attach the skirt to only the main fabric, and then fold the lining down over the seam, press and pin in place, and topstitch around.  You can whipstitch here as well if you don't want a topstitch on the outside, but  it went with the look I was going for, so that's what I did.  And you're done!

Tie Dye Diva Perfect Party Dress from Keep Calm and Carrion

 Inara totally loves the finished dress and had a ball modelling..

Tie Dye Diva Perfect Party Dress from Keep Calm and Carrion


Thank you so much for taking the time to check out my dress!  I had SO much fun working with this pattern and I'm really excited to be part of this tour.  Thank you to Kathy and Jen for doing this and for letting me participate!   Again, the dress is available here in the Tie Dye Diva pattern shop.  I think this dress is definitely worth picking up and having some creative fun with!  Make sure you check out the rest of the bloggers on the tour as well: 


Thanks for stopping by!
The Perfect Party Dress from Tie Dye Diva by Keep Calm and Carrion
 HTML Map