I have a special place in my heart for Anne and Sofilantjes patterns. I tested her first pattern, and various ones up to now, and I have found her to be kind and receptive in every test. She listens to her testers and discusses proposed changes with us, and really makes you feel like part of a team.
So this new dress... is just beautifully done. Meet the Brueram:
The details:
Sizes 12mo - 14yrs (designed for non-developing chests)
Three skirt options: top, dress, maxi (top and maxi use cutting chart for pieces)
Instructions for shirred or elastic casing for the back.
Made for Woven fabrics
Lined bodice and enclosed bodice seams.
The version directly above is the maxi. I used a pretty shirting fabric I found at Joann's that just screamed SUMMER at me. And Inara is totally in love with it. The instructions were clear and easy to follow along. They may seem out of order if you've never shirred before, but the way the dress is constructed nicely encloses the bodice seams AND locks the shirring in at the sides.
The straps are part of the front bodice piece and are angled to meet at the mid back. The amount of stretch to the bodice allowed Inara to get in and out on her own. I chose to shirr both of my dresses, because one I learned how, I really like doing it. And amazingly, I've found that it doesn't itch Miss Sensitive skin, like I thought it would.
**I have a brother, if you do too, make sure you tighten the tension on the bobbin case like one full turn before shirring.. and don't forget to turn it back when you are done!
What I love: I love the multiple skirt options, and I think my absolute favorite part - the wide straps! The straps are wide enough that the dress meets the dress code requirement for Inara's school, so she has pretty, light summer dresses to wear as it warms up!
What I'd change: I think for time's sake, I might make the next dress with the maxi width measurements and the length more a standard dress. I love the style of the faux-wrap skirt, but there is something immensely satisfying about a super-fast gorgeous sew!
It's a little hard to tell in my multi-colored batik, but the skirt of the dress version is done in a faux-wrap style that adds just a hint of whimsy to the pattern, and I totally love it.
The dress is on sale right now in the Sofilantjes Shop for $5... and it's worth that and more! And once you grab it, if you join the Sofilantjes Sew and Show Facebook Group there are a bunch of really friendly people to help and chat with and show off your Brueram!
Showing posts with label Woven Fabric Patterns. Show all posts
Wednesday, April 29, 2015
Wednesday, April 15, 2015
MCM Studio Designs Blog Tour - Estherlyn's Jumper
Hi! Welcome to day three of the MCM Studio Designs Blog Tour!
I was lucky enough to test the Love Bird Dress a couple monthds ago, and was really impressed with Linda's patterns, so when she said "blog tour?" I jumped on it. And today I am going to show you a couple versions of Estherlyn's Jumper.
First, the details:
Sizes: 3m through 10yrs
Fully or partially lined options.
Made for woven fabrics
Buttons at shoulders
Cute Asymmetrical Apron
Multiple pocket/applique options included.
First up, the more traditional one... this one I used some Riley Blake and Michael Miller fabrics that have sat in my stash for ... well over a year... probably closer to two years, waiting for the *right* pattern. I think I found it!
This is the fully lined version, with the apron and I used the included patch pocket that was included. From start to finish, this pattern took under two hours to complete, and I am totally thrilled with it. Inara is at the top of the range for the size 6, so I did a size 7 with a size 6 length.
Inara's chest is 24.5", and the size 6 says 24" chest and size 7 says 26". So I she probably could have had a more fitted look with the size 6, but as it is, it is just loose enough to wear a sleeved shirt underneath, since it's still cool here, it's perfect!
After finishing that one, I decided I wanted to show off another way the pattern could look. So after a ton of browsing around on the Whimsical Fabric site, I picked a couple prints from the Sidewalks Line. And then after (very little) more waffling, I added on some more of the Ruffle-Rac that I am totally obsessed with, and a couple of Riley Blake Buttons. Okay, supplies all gathered... here's where I went with it:
Same dress... different look! This is the partially lined version - so lighter for summer and beach wear... but still encloses all of the bodice seams nicely. And I left off the apron, and instead added some ruffle-rac long the bodice. *Squeal* I love it!!
And used some of the included appliques, and the buttons I ordered, to add a cute detail to the bottom of the pattern.
I think together it creates the sweetest little summer dress. And leaving the apron off, it took even less time to sew and still looks fantastic! I had so much fun with this pattern. It's so fun to customize and the instructions were clear and easy to follow.
What I liked: The fit is spot on, the partial and full linings are both well written and enclose all the seams that would otherwise itch the heck out of Inara. I LOVE how fast it is to sew, and the ability to highlight fabrics.
What I'd change: I think the length is a little longer than I'd like to see for Inara, even though I did the size 6 length, Inara is at the bottom of the range for the size 6, so if I want a shorter look, I know to cut the 5 length for the next one. That said, the measurements match the finished chart perfectly, so its not the pattern!
Through April 25th, all of the MCM patterns are 25% off. They are already marked down in her Craftsy Shop and in her Big Cartel Shop use the code SPRINGSALE25. I highly recommend both this and the Love Bird. I haven't made the Ginger Snap yet, but some of the other bloggers have posted it, and I am totally in love!
And after that, make sure you check out the MCM Studio Designs blog. Why? Well, first, so you can get the links to check out all of the other awesome bloggers. And second, to find out how to enter to win a pattern of your choice!
Thanks for stopping by!
I was lucky enough to test the Love Bird Dress a couple monthds ago, and was really impressed with Linda's patterns, so when she said "blog tour?" I jumped on it. And today I am going to show you a couple versions of Estherlyn's Jumper.
First, the details:
Sizes: 3m through 10yrs
Fully or partially lined options.
Made for woven fabrics
Buttons at shoulders
Cute Asymmetrical Apron
Multiple pocket/applique options included.
First up, the more traditional one... this one I used some Riley Blake and Michael Miller fabrics that have sat in my stash for ... well over a year... probably closer to two years, waiting for the *right* pattern. I think I found it!
This is the fully lined version, with the apron and I used the included patch pocket that was included. From start to finish, this pattern took under two hours to complete, and I am totally thrilled with it. Inara is at the top of the range for the size 6, so I did a size 7 with a size 6 length.
Inara's chest is 24.5", and the size 6 says 24" chest and size 7 says 26". So I she probably could have had a more fitted look with the size 6, but as it is, it is just loose enough to wear a sleeved shirt underneath, since it's still cool here, it's perfect!
After finishing that one, I decided I wanted to show off another way the pattern could look. So after a ton of browsing around on the Whimsical Fabric site, I picked a couple prints from the Sidewalks Line. And then after (very little) more waffling, I added on some more of the Ruffle-Rac that I am totally obsessed with, and a couple of Riley Blake Buttons. Okay, supplies all gathered... here's where I went with it:
Same dress... different look! This is the partially lined version - so lighter for summer and beach wear... but still encloses all of the bodice seams nicely. And I left off the apron, and instead added some ruffle-rac long the bodice. *Squeal* I love it!!
And used some of the included appliques, and the buttons I ordered, to add a cute detail to the bottom of the pattern.
I think together it creates the sweetest little summer dress. And leaving the apron off, it took even less time to sew and still looks fantastic! I had so much fun with this pattern. It's so fun to customize and the instructions were clear and easy to follow.
What I liked: The fit is spot on, the partial and full linings are both well written and enclose all the seams that would otherwise itch the heck out of Inara. I LOVE how fast it is to sew, and the ability to highlight fabrics.
What I'd change: I think the length is a little longer than I'd like to see for Inara, even though I did the size 6 length, Inara is at the bottom of the range for the size 6, so if I want a shorter look, I know to cut the 5 length for the next one. That said, the measurements match the finished chart perfectly, so its not the pattern!
Through April 25th, all of the MCM patterns are 25% off. They are already marked down in her Craftsy Shop and in her Big Cartel Shop use the code SPRINGSALE25. I highly recommend both this and the Love Bird. I haven't made the Ginger Snap yet, but some of the other bloggers have posted it, and I am totally in love!
And after that, make sure you check out the MCM Studio Designs blog. Why? Well, first, so you can get the links to check out all of the other awesome bloggers. And second, to find out how to enter to win a pattern of your choice!
Thanks for stopping by!
Tuesday, March 17, 2015
Bella Sunshine Designs Holiday Cutout Blog Tour: Day 2
Welcome to Day Three of the Bella Sunshine Designs Holiday Cutout Blog Tour! And Happy Saint Patrick's Day!
Since it's St. Patty's Day, I decided to give you a look at the shamrock cutout version. And here is our take on the Bella Sunshine Designs Holiday Cutout Top and Dress.
The details:
Sizes 12m - 10
Dress or Top Version
Instructions for Cutout or Applique
Includes 6 different shape printouts.
I did the dress version with both an applique and a cutout. The cutouts come in three sizes and the pattern includes recommendations on which to use for different size kids. I used the recommended medium sized cutout for Inara's, since she is a size 6 and I think the size is great on her.
I also added an applique to the skirt as well. I wasn't sure if it was *too* much, but Inara insisted it was needed, so I went for it. The pattern even includes instructions on how to applique the design on nicely.
I think what I love most about this pattern is that it is really easy to customize how you want. Not even just with fabrics and cutouts, but you can make the skirt pieces wider for more fullness and twirl, or you can even do the skirt in knit if you wanted. Or you can do what I did... FOE instead of the straps. I was going to do the tie straps in green to pull it all together, but with tie straps, she wouldn't be able to wear it to school, so I decided to try something a little different and make the bodice binding and straps out of FOE, so that they would stretch to go on and off, but wouldn't be able to be untied!
We also decided to stick a shirt on under it since she wanted to keep it on all day and its a bit chilly here still...
What I love about it: I love how it's so easy to customize... Have you seen some of the other bloggers on the tour (You can see the other two for today here!)?? There are all sorts of personal touches you can use with this pattern as a base.
What I would change: The bodice is attached to the skirt so that you enclose the waist seam (yay!), but the way it's attached requires you to top-stitch that seam where I'd rather whip-stitch the lining closed, and forego the top-stitching. But that's personal preference, isn't it?
Really though, the pattern is fantastic. The fit was perfect without any adjustments, and the instructions are clear and easy to follow. Here's an endorsement.. I actually tested the leggings and not the top, but bought the top when it was released because I really enjoyed the testing period and liked her writing style and the care she put into the fit and instructions. There is even a free pattern in her shop if you want to check her out before buying!
While you're grabbing this great pattern, you should definitely grab the Bow Tie Leggings from the Bella Sunshine Designs Shop as well... I made them for Inara to go with this top... and the bows can be done in knit or woven, so they match the dress!!
Don't laugh too much at her shoes... she got them from a consignment sale and wears them ALL over the place. As for the dress... we both love the look of it... feminine and well fitting, without being over the top. It's perfect for my fickle child!
The code: BLOGTOUR will get you 20% off both patterns here, so grab them while they are on sale... then make sure to check out all the other awesome bloggers for the week!
Thanks for stopping by to check out my dress!
*disclaimer: this post includes affiliate links, but all opinions are my own!
Since it's St. Patty's Day, I decided to give you a look at the shamrock cutout version. And here is our take on the Bella Sunshine Designs Holiday Cutout Top and Dress.
The details:
Sizes 12m - 10
Dress or Top Version
Instructions for Cutout or Applique
Includes 6 different shape printouts.
I did the dress version with both an applique and a cutout. The cutouts come in three sizes and the pattern includes recommendations on which to use for different size kids. I used the recommended medium sized cutout for Inara's, since she is a size 6 and I think the size is great on her.
I also added an applique to the skirt as well. I wasn't sure if it was *too* much, but Inara insisted it was needed, so I went for it. The pattern even includes instructions on how to applique the design on nicely.
I think what I love most about this pattern is that it is really easy to customize how you want. Not even just with fabrics and cutouts, but you can make the skirt pieces wider for more fullness and twirl, or you can even do the skirt in knit if you wanted. Or you can do what I did... FOE instead of the straps. I was going to do the tie straps in green to pull it all together, but with tie straps, she wouldn't be able to wear it to school, so I decided to try something a little different and make the bodice binding and straps out of FOE, so that they would stretch to go on and off, but wouldn't be able to be untied!
We also decided to stick a shirt on under it since she wanted to keep it on all day and its a bit chilly here still...
What I love about it: I love how it's so easy to customize... Have you seen some of the other bloggers on the tour (You can see the other two for today here!)?? There are all sorts of personal touches you can use with this pattern as a base.
What I would change: The bodice is attached to the skirt so that you enclose the waist seam (yay!), but the way it's attached requires you to top-stitch that seam where I'd rather whip-stitch the lining closed, and forego the top-stitching. But that's personal preference, isn't it?
Really though, the pattern is fantastic. The fit was perfect without any adjustments, and the instructions are clear and easy to follow. Here's an endorsement.. I actually tested the leggings and not the top, but bought the top when it was released because I really enjoyed the testing period and liked her writing style and the care she put into the fit and instructions. There is even a free pattern in her shop if you want to check her out before buying!
While you're grabbing this great pattern, you should definitely grab the Bow Tie Leggings from the Bella Sunshine Designs Shop as well... I made them for Inara to go with this top... and the bows can be done in knit or woven, so they match the dress!!
Don't laugh too much at her shoes... she got them from a consignment sale and wears them ALL over the place. As for the dress... we both love the look of it... feminine and well fitting, without being over the top. It's perfect for my fickle child!
The code: BLOGTOUR will get you 20% off both patterns here, so grab them while they are on sale... then make sure to check out all the other awesome bloggers for the week!
Thanks for stopping by to check out my dress!
*disclaimer: this post includes affiliate links, but all opinions are my own!
Saturday, March 14, 2015
Pattern Review: Adeline Dress and Tunic from Boho Banjo
Well, I've been doing some sewing for me... so don't laugh at my awkward modeling... I even tried one of the poses that my photo editing software said was one of the most flattering poses for women... I ended up looking rather awkward. BUT I really liked this pattern, so awkward posing aside, I need to show it off.
This is my first time sewing for this designer, who is part of the Aspriring Designers' Challenge on Pattern Revolution. Meet the Adeline Tunic from Boho Banjo Art To Wear.
I really enjoyed making this tunic, and I really like how flattering it ended up. When I first saw the sketches I thought that maybe it wasn't going flatter my *wide* hips, but once its on, it flows and drapes so nicely I just love it. The pattern fits a range of sizes - the large fits US sizes 14-24 (bust sizes 36-52. The small fits US 6-10. It also works in knit or woven fabrics, and I think you could get away with a combination of the two as well.
![]() |
| This is the pose that my photo editor said to use... do I look weird? |
The blue and black one is done in a cotton/rayon blend knit with the side panels done in a black interlock. It's super comfortable and I'm actually wearing it tomorrow to see some friends from where I used to live. The longest part of the pattern is cutting and taping the pieces... BUT *woohoo* the pattern comes with a print-shop option as well, so if you don't want to sit and cut and tape all the pages, just run it to the print shop!
What I love: I really like how it fits... loose but still flattering and gives a nice shape line. The instructions were easy to follow and well written, and are detailed for all the various options.
What I'd change: I didn't consider the weight of my fabric on the knit one, so the weight of the fabric pulls it down a little in length. Since I used stripe, I didn't want to do the stripes horizontally, which would have alleviated my pull issue, but In the future I think I'll want to take 1" or so off the bodice before adding the skirt pieces.
What I love: I really like how it fits... loose but still flattering and gives a nice shape line. The instructions were easy to follow and well written, and are detailed for all the various options.
What I'd change: I didn't consider the weight of my fabric on the knit one, so the weight of the fabric pulls it down a little in length. Since I used stripe, I didn't want to do the stripes horizontally, which would have alleviated my pull issue, but In the future I think I'll want to take 1" or so off the bodice before adding the skirt pieces.
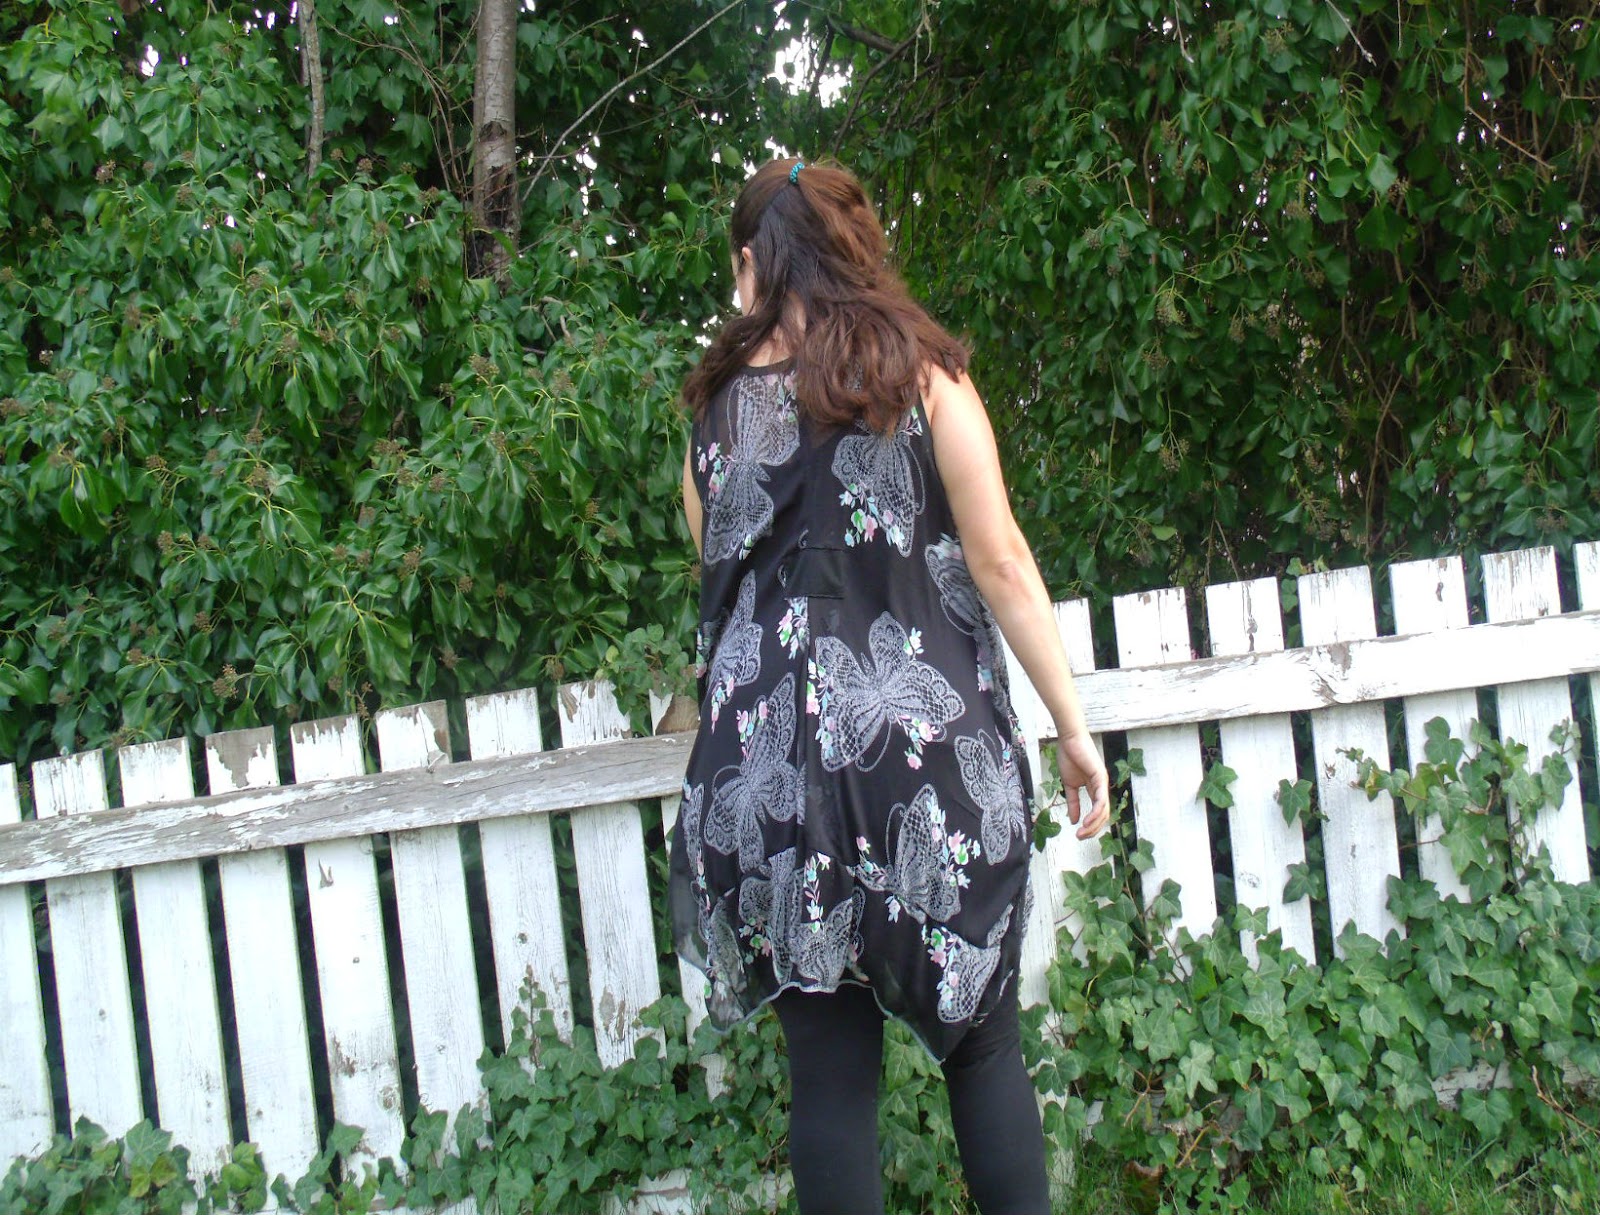
The one above is my woven version. I this one in a chiffon print that I picked up specifically for this pattern and I just love how it looks. It's light and flowy, and I just stuck a plain tank top underneath, and I think it will be perfect for the beach this summer as well. The pattern has two options for binding the neck and arms as well, but I did knit binding on both of mine, as I wasn't sure I could battle chiffon on the bias to make the bias-bound option.
All in all sewing time took about 2 hours, maybe a little less, as I was a bit paranoid about messing up the front pleat, so I kept rechecking my lines. I really love how the pleat brings in the front area and then it spreads back out for the lower half... Creates a nice waistline illusion.
The back has the same figure flattering pleat as the front, which I do think works well even with a tush the size of mine. The pattern uses illustrations along with detailed instructions on how to create your tunic (or dress... it has a dress length as well, but I made both of mine in the tunic length. I think I want a dress length one for the summer though).
The pattern is available in the Boho Banjo shop and you should definitely grab this as an awesome wardrobe add on! And make sure you take a moment to read more about the designer Pearl, on her Aspiring Designer Challenge Post on the Pattern Revolution Blog. And check out some of the made to order dresses in her shop... she prints her own original artwork on them and they are so cool!
Thanks for checking out my post... and not giggling too hard at my attempts at modeling this fantastic new pattern!
Wednesday, February 11, 2015
Pattern Review: MCM Love Bird Dress
Good morning! Today I get to show you a dress that I totally love, and if you grab it today, you can have it done for Valentine's Day!
Here is the Love Bird Dress from MCM Studio Designs.
In retrospect... that dot fabric was not a wise choice for photo taking but bear with me, because the dress is fantastic. *Disclaimer: I received this pattern for free in return for testing, but all opinions are completely my own!
The details:
Sizes 2 -14 years
Made for Woven fabrics
Two skirt options: plain or ruffled back
Two ruffled back options: 3 or 4 tiers
Three sleeve options: cap, petal or sleeveless
Optional apron that can also be made reversible
Heart cutout on back bodice
Includes two applique templates
Inara is wearing the cap sleeve, 4 tiered back, with reversible apron style. And I totally love it. The ruffles are curved flounces, so there isn't a bunch of gathering to do. In fact, the only gathering I did was on mys sleeves.
The instructions are very clear and easy to follow illustrations, and I found the techniques to result in a nice professional looking finish.
I used the Waverly prints that everyone is raving about from Walmart. I did find that they shrunk more than I expected in the wash, just so you know.
The pattern comes with instructions for buttons and a buttonhole template, a continuous bound skirt placket, and hand stitching the bodice lining to enclose the waist seam.
What I loved: I love the longer length of the skirt, as I think it lends itself nicely to being a more dressy pattern if you choose the right fabrics. I LOVE that they are flounces, not ruffles, and they make for the prettiest back detail without being over the top. The shape of the apron allows the ruffles to peak out in the back. And I like how you can change the whole look with the apron. I also love how the bodice lends it self nicely to applique, colorblocking, or embroidery.
What I'd change: I think I'd go back and under-stitch my neckline so it stays in place, but she's worn the dress twice now, and its held up well without it. And this isn't a change, but when it warms up, I am going to try doing the 4 tier pieces, but only use three of them, so I can make a shorter, sassier one for summer!
This is my first time sewing a pattern from MCM, and I've gone back and added Estherlyn's Jumper to my "buy" list, as I quite like the asymmetrical look, and I was very happy with pattern writing style of this designer.
Inara loves the dress, and I do a well. The fit is nice, the style is elegant, and the instructions are well written. I think I've found a great new designer to follow!
The pattern is available here, at the sale price of $8.00 through Monday!
Monday, February 9, 2015
Boys Can Wear Pink Blog Tour
Hi, and welcome to my day of the Boys Can Wear Pink Blog Tour hosted by the awesomely creative Kelly of Handmade Boy.
The whole concept behind this blog series makes me smile. If you've seen pictures of Connor before, he wears blue and pink Frozen Sneakers that were the only shoes he would pick out after going to three different stores. He carries his pirate sword and Minecraft toys in a purple princess lunchbox. And likes having his nails painted with blue sparkly polish. But above all of that, he picks his own clothes and his own fabrics for when I make him stuff.
So this is our first *pink* outfit. He picked out the My Little Ponies and the blue to go with it. When we went to pick the piping, I suggested yellow, black, and turquoise. He picked pink. In retrospect, its a good thing he did, because it matches rather well.
When we went to the store, all I told him was to pick a fabric he liked that had some pink in it. He actually picked two, but you'll have to wait for our second outfit!
For the shirt I used the Dandelions 'n' Dungarees Old Tyme Baseball Shirt. This pattern comes in 3 size grouping, but the the bundle is the best deal.. and if you wait until tomorrow to pick it up, you'll get the newly revamped pattern pieces that are being finished up as I type. The pattern has button instructions (and very awesomely explains male vs female buttoning), but I did the snaps for Connor so he could take it off himself. Awesome bonus! The code boys30 gets you a discount in the Dandelions 'n' Dungarees Etsy shop through Wednesday night!
For the pants, I used my go-to woven pants pattern: Little Kiwi's Closet Paneled Pants and Shorts. I use this pattern for both kids when I need a pants pattern with a cool coordinating detail. And there is cute bow or pocket options to add as well. I think of all the patterns I own, this is the one I most often make.
You'd think that the My Little Pony watcher in the house would be Inara, but nope. She doesn't like MLP anymore and gave her mini-figures to Connor who loves it. So thankfully they area toy that got happily passed from one kid to the next!
I love the outfit with the pops of pink in it. I'm also thrilled that his daddy thinks the outfit is cool (whew!), and most of all, I'm happy that he loves it, because that's what its all about... dressing him in clothes that he loves that show him that he can wear anything he wants and colors don't have genders!
Connor says to go enter the giveaway below! With this awesome list of prizes it's totally worth it!
a Rafflecopter giveaway
Thanks for stopping by! And please check out the rest of the talent posting this month and keep tabs at the round up post.
The whole concept behind this blog series makes me smile. If you've seen pictures of Connor before, he wears blue and pink Frozen Sneakers that were the only shoes he would pick out after going to three different stores. He carries his pirate sword and Minecraft toys in a purple princess lunchbox. And likes having his nails painted with blue sparkly polish. But above all of that, he picks his own clothes and his own fabrics for when I make him stuff.
So this is our first *pink* outfit. He picked out the My Little Ponies and the blue to go with it. When we went to pick the piping, I suggested yellow, black, and turquoise. He picked pink. In retrospect, its a good thing he did, because it matches rather well.
When we went to the store, all I told him was to pick a fabric he liked that had some pink in it. He actually picked two, but you'll have to wait for our second outfit!
For the shirt I used the Dandelions 'n' Dungarees Old Tyme Baseball Shirt. This pattern comes in 3 size grouping, but the the bundle is the best deal.. and if you wait until tomorrow to pick it up, you'll get the newly revamped pattern pieces that are being finished up as I type. The pattern has button instructions (and very awesomely explains male vs female buttoning), but I did the snaps for Connor so he could take it off himself. Awesome bonus! The code boys30 gets you a discount in the Dandelions 'n' Dungarees Etsy shop through Wednesday night!
For the pants, I used my go-to woven pants pattern: Little Kiwi's Closet Paneled Pants and Shorts. I use this pattern for both kids when I need a pants pattern with a cool coordinating detail. And there is cute bow or pocket options to add as well. I think of all the patterns I own, this is the one I most often make.
You'd think that the My Little Pony watcher in the house would be Inara, but nope. She doesn't like MLP anymore and gave her mini-figures to Connor who loves it. So thankfully they area toy that got happily passed from one kid to the next!
I love the outfit with the pops of pink in it. I'm also thrilled that his daddy thinks the outfit is cool (whew!), and most of all, I'm happy that he loves it, because that's what its all about... dressing him in clothes that he loves that show him that he can wear anything he wants and colors don't have genders!
Connor says to go enter the giveaway below! With this awesome list of prizes it's totally worth it!
One yard of Stenzo Pit Stop Poplin in pink from Mabel Madison
$25 gift certificate, plus a surprise fat quarter from Phat Quarter Shop
One yard of solid cotton/lycra & one yard of coordinating fabric from Purple Seamstress
One pattern of choice from Paisley Roots
$20 store credit from Peek-a-Boo Pattern Shop
One pattern of choice from Patterns for Pirates
One pattern of choice from Mouse House Creations
One Pattern of choice from Titchy Threads
a Rafflecopter giveaway
Thanks for stopping by! And please check out the rest of the talent posting this month and keep tabs at the round up post.
Saturday, January 31, 2015
Pattern Review: Sis Boom Gabriella Fae (Girl's Bundle Up!)
Back again with more Bundle Up goodness. Today I get to show you my lovely Gabriella Fae. The awesome pattern included in the bundle from SisBoom.
*Disclaimer*I was given this pattern as part of my participation in the Bundle Up Blog Tour, but all opinions and sewing are my own! For my stop on the tour I made the LilyGiggle Cecille, and you can see my post here!
We made two of these as well, because the different options gave them totally different looks and I wanted to try and show you guys that.
First off, the details:
Sizes: 12mo - 13/14
Three sleeve options: Long, short, sleeveless
Two bodice options: flat or gathered
Zippered back.
Multiple skirt lengths included in instructions.
I sewed the sleeveless, gathered bodice, knee length option first, in this really pretty nautical print I've been hanging on to.
It's about 40 out in these pictures, with a nice breeze of the ocean, so I'm really impressed that she was so happy in the pictures! I'm pretty sure that's a good testament to how much she likes the dress.
What I loved: I really love how different just adding a sleeve and using the different bodice types makes the dress look. I think the longer with the sleeves is perfect for a winter or fall dress, and its dressy without having lots of ruffles, which gives it a nice polished look. As with all of the SS/SB patterns, I LOVE how I can just look at the chart of the kid to pick my sleeve and skirt lengths. Inara is really average, and so I just grab measurements off the charts and they fit her nicely. I love the little bit of flare that the gathered bodice gives the dress. And I LOVE that it's a zippered back!
What I would change: There is one thing that I did differently from the first dress to the second. I cut the lining band pieces 1/2" longer than the outer pieces. I then sewed the skirt to only the outer band and folded the bottom of the lining under, pressed and slip-stitched it to encase the seam.
I'm really glad that I took the time to make these, and I will definitely be making more, for both Inara and as gifts! And I think I'm sold on getting the women's version of this for myself too!
If you haven't Bundled Up, you've only got 3 more days! Remember... you can get 11 awesome and (temporarily) exclusive patterns for as low as $4.00ea!!
Thanks for stopping by... if you're around tomorrow, maybe I'll show off another Bundle up pattern I've made!
*Disclaimer*I was given this pattern as part of my participation in the Bundle Up Blog Tour, but all opinions and sewing are my own! For my stop on the tour I made the LilyGiggle Cecille, and you can see my post here!
We made two of these as well, because the different options gave them totally different looks and I wanted to try and show you guys that.
First off, the details:
Sizes: 12mo - 13/14
Three sleeve options: Long, short, sleeveless
Two bodice options: flat or gathered
Zippered back.
Multiple skirt lengths included in instructions.
I sewed the sleeveless, gathered bodice, knee length option first, in this really pretty nautical print I've been hanging on to.
![]() |
What I loved: I really love how different just adding a sleeve and using the different bodice types makes the dress look. I think the longer with the sleeves is perfect for a winter or fall dress, and its dressy without having lots of ruffles, which gives it a nice polished look. As with all of the SS/SB patterns, I LOVE how I can just look at the chart of the kid to pick my sleeve and skirt lengths. Inara is really average, and so I just grab measurements off the charts and they fit her nicely. I love the little bit of flare that the gathered bodice gives the dress. And I LOVE that it's a zippered back!
What I would change: There is one thing that I did differently from the first dress to the second. I cut the lining band pieces 1/2" longer than the outer pieces. I then sewed the skirt to only the outer band and folded the bottom of the lining under, pressed and slip-stitched it to encase the seam.
I'm really glad that I took the time to make these, and I will definitely be making more, for both Inara and as gifts! And I think I'm sold on getting the women's version of this for myself too!
If you haven't Bundled Up, you've only got 3 more days! Remember... you can get 11 awesome and (temporarily) exclusive patterns for as low as $4.00ea!!
Thanks for stopping by... if you're around tomorrow, maybe I'll show off another Bundle up pattern I've made!
Subscribe to:
Posts (Atom)


.png)